
by Navadeep Varma | May 5, 2026 | Blog
In the rapidly evolving digital landscape, simply having an Instagram presence is no longer enough to stand out. Businesses are constantly seeking innovative ways to connect with their target audience, drive engagement, and convert followers into customers. Understanding and implementing a robust Instagram SEO strategy is no longer a luxury but a critical necessity for any business aiming for sustainable growth.
As we look towards 2026, the power of visual search and platform-specific discoverability will only intensify. This makes mastering Instagram SEO absolutely essential. It’s about more than just trending hashtags; it’s about optimizing every facet of your profile and content to ensure maximum visibility to potential customers actively searching for what you offer.
What Exactly Is Instagram SEO?
At its core,Instagram SEO refers to the process of optimizing your Instagram profile and content to rank higher in the platform’s search results and discoverability features. Just like traditional search engine optimization (SEO) helps websites appear on Google, Instagram SEO helps your account and posts get seen by more users within the Instagram ecosystem. This includes search queries, the Explore page, suggested accounts, and even within Reels and Shops.
Unlike conventional SEO which primarily deals with keywords and backlinks on external websites, Instagram SEO focuses on on-platform signals. This means optimizing your username, name, bio, image alt text, hashtags, captions, and the content format itself (Reels, Guides, Posts) to align with what users are searching for and what Instagram’s algorithms prioritize for discoverability. The goal is to signal to Instagram that your content is relevant and valuable to specific user interests, thereby increasing your organic reach and attracting a more targeted audience.
The Core Benefits of Mastering Your Instagram Presence
For any business, the benefits of a well-executed Instagram SEO strategy are transformative. In an era where digital presence dictates market share, ensuring your brand is easily discoverable on one of the world’s largest social platforms is paramount.
- Increased Organic Reach: By optimizing for Instagram SEO, your content appears in more relevant searches and on the Explore page, significantly boosting your organic visibility without relying solely on paid ads.
- Higher Quality Leads: When users discover your business through specific searches, they already have an intent. This means the leads generated through effective Instagram SEO are often more qualified and closer to conversion.
- Enhanced Brand Authority: Appearing prominently in search results establishes your brand as an authority in your niche. Consistent, optimized content builds trust and credibility with your audience.
- Competitive Advantage: Many businesses are still behind on comprehensive Instagram SEO. Adopting these strategies now gives you a significant edge over competitors who aren’t leveraging the platform’s full discoverability potential.
- Improved Engagement Rates: Content that reaches the right audience naturally garners more meaningful interactions, leading to higher engagement rates and a more active community around your brand.
A recent study by Hootsuite indicated that businesses optimizing for Instagram’s search capabilities saw an average 25% increase in profile visits and 15% increase in website clicks directly from the platform. This demonstrates the tangible impact that prioritizing effective Instagram SEO can have on your business’s bottom line.
Practical Strategies to Boost Your Instagram SEO in 2026
Implementing a successful Instagram SEO strategy requires a holistic approach, touching upon various elements of your Instagram profile and content. Here are actionable tips to ensure your business stands out:
Optimize Your Profile for Search
Your Instagram profile is your digital storefront. Ensure your username and name field include relevant keywords that describe your business. Your bio should be concise, keyword-rich, and clearly state what you do and who you serve. Use your bio link strategically, perhaps directing users to your main website or a specific landing page.
Keyword Research for Hashtags and Captions
Just like traditional SEO, keyword research is crucial for Instagram. Identify relevant hashtags, both broad and niche-specific, that your target audience is using or searching for. Incorporate these into your captions, but also think beyond just hashtags. Instagram’s algorithm can understand the context of your captions. Use keywords naturally within your caption text to further improve discoverability.
Leverage Alt Text for Images and Videos
Many users overlook this powerful SEO tool. Alt text describes your image for visually impaired users but also helps Instagram’s algorithm understand your content. Always add descriptive alt text to your posts, incorporating relevant keywords. For videos, ensure your titles and descriptions are optimized.
Engage and Analyze
Active engagement signals to Instagram that your account is valuable. Respond to comments, engage with DMs, and interact with other accounts in your niche. Use Instagram Insights to monitor your performance. Pay attention to which content formats (Reels, Stories, Carousels) and hashtags bring the most reach and engagement. This data-driven approach is vital for refining your Instagram SEO tactics and ensuring you’re constantly improving.
Harness the Power of Newer Features
Instagram continuously rolls out new features like Reels, Guides, and Instagram Shop. These are prime opportunities for discoverability. Reels, in particular, have a high potential for organic reach due to their short-form video format. Optimize your Reels with trending audio, relevant text overlays, and strong keyword-rich captions. Consider creating Instagram Guides for longer-form, evergreen content that showcases your expertise. Kleza’s expert digital marketing services can help businesses craft these strategies effectively.
Ready to Elevate Your Instagram Presence?
Over time, businesses that fail to grasp the nuances of Instagram SEO will find themselves falling behind. It’s not just about posting; it’s about optimizing for visibility, engagement, and ultimately, growth. For more insights and expert advice on staying ahead in the digital world, explore further insights on the Kleza blog, or learn more about our comprehensive approach on the Kleza About Us page.
Whether you’re looking for website development, mobile app development, or robust digital marketing strategies to dominate platforms like Instagram, Kleza is your dedicated partner in navigating the complexities of the digital world.
Don’t let your business get lost in the scroll.Contact Kleza today to consult with our experts and develop a tailored digital strategy that leverages the full potential of Instagram SEO, driving real results for your business.
by Navadeep Varma | Apr 29, 2026 | Blog
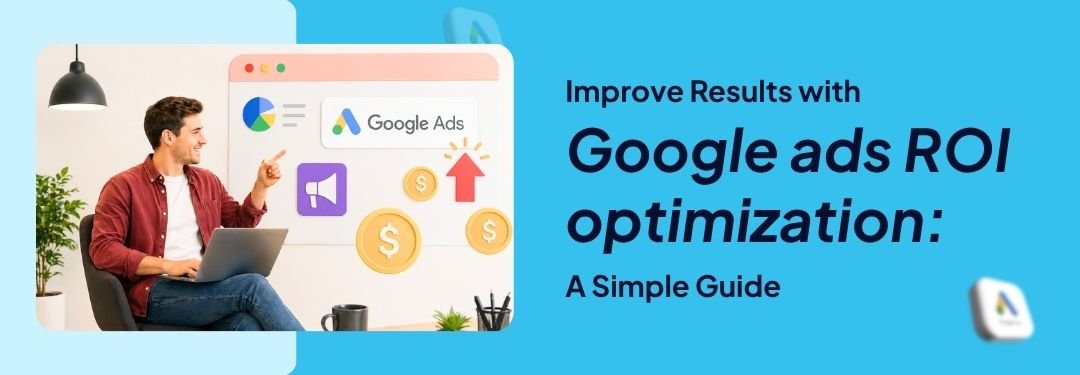
Running successful digital ad campaigns is not as simple as it seems. It requires the right strategy, continuous optimization, and a clear understanding of what drives real results. With Google Ads, success depends on how effectively campaigns are planned and executed over time. And even with all of that in place, the real question is whether any of that maximizes your return on investment (ROI). That is where Google ads ROI optimization quietly steps in and separates “we are getting traffic” from “we are actually making profit.”
Most businesses do not fail at running ads, they fail at understanding what the ads are really doing. It is very easy to feel successful when dashboards are full of numbers, but much harder when sales do not match the excitement. Google ads ROI optimization is what fixes that gap. It focuses on making every dollar work harder and cutting what does not perform, so that your campaigns stop being guesswork and start behaving like a proper growth engine. This guide will help you cut through the noise and turn your campaigns into something far more useful than expensive experiments, a reliable and scalable growth engine.
Laying the Foundation: Strategic Setup for Google ads ROI optimization
The journey to superior Google ads ROI optimization begins long before your ads go live. A strong foundation ensures every dollar spent contributes effectively to your objectives. Without clear goals and precise targeting, even the most appealing ad copy will fall flat. To build a strong foundation, start here:
Define Clear Objectives and KPIs
Before launching any campaign, clearly define what success means for your business. Are you aiming for more website traffic, lead generation, or direct sales? Each goal needs a different strategy and different metrics to measure performance. For example, an e-commerce business may focus on conversion value, while a B2B service may prioritize qualified leads. Setting your Key Performance Indicators (KPIs) early helps you track the right results and improve Google ads ROI optimization effectively..
Master Keyword Research and Targeting
Effective keyword research is the backbone of any successful Google Ads campaign. Go beyond obvious terms to uncover long-tail keywords that indicate higher purchase intent. Utilize negative keywords to filter out irrelevant searches, saving ad spend on clicks that won’t convert. Precision in targeting ensures your ads reach the most receptive audience, directly impacting your ROI. Combine this with geographic, demographic, and audience targeting to hone in on your ideal customer.
Implement Smart Bidding Strategies
Google Ads has automated bidding options like ‘Maximize Conversions,’ ‘Target CPA (Cost Per Acquisition),’ or ‘Target ROAS (Return On Ad Spend)’. In simple terms, you tell Google your goal and it uses machine learning to adjust bids in real time so you don’t have to sit there guessing. For example, if your primary goal is to generate sales, a ‘Target ROAS’ strategy can be incredibly effective in ensuring every conversion is profitable. If you want leads at a steady cost, Target CPA keeps things controlled. Basically, you stop guessing and let Google do the math.
Continuous Optimization: Refining Your Campaigns for Better Returns
Launching a campaign is just the beginning. The real work in achieving strong Google ads ROI optimization comes from ongoing analysis, testing, and refinement. The digital landscape is constantly evolving, and your campaigns must adapt with it. Here’s exactly what you need to do:
Optimize Ad Copy and Landing Pages
Your ad copy is the first impression, and your landing page is where conversions happen. Ensure your ad copy is compelling, highlights your unique selling proposition, and includes a clear call to action. Critically, your landing page must be relevant to the ad, fast-loading, mobile-friendly, and designed for seamless user experience. Even a small disconnect between the ad and landing page, or a poorly designed page, can increase bounce rates and reduce conversions, which ultimately hurts your ROI.
A/B Testing for Performance Enhancement
Never assume your current ads or landing pages are the best they can be. Regularly conduct A/B tests on different headlines, descriptions, images, and calls to action. Test variations of your landing pages to see what resonates most with your audience. Small improvements in click-through rates (CTR) and conversion rates can lead to significant gains in your overall ROI. For instance, a major e-commerce retailer once increased their conversion rate by 12% simply by optimizing their product page layout and CTA button color, directly translating to enhanced Google ads ROI optimization.
Leverage Performance Data and Analytics
Google Analytics and Google Ads reporting give you a lot of data, but not all of it is useful unless you actually act on it. Instead of focusing only on clicks and impression, dig deeper into which keywords, ads, and audiences are actually driving results. Then, yes, reduce spend on what is clearly underperforming, even if it “looks” promising on paper. Focus on what actually matters: conversion rates, cost per conversion, and return on ad spend, because activity without results is just an expensive hobby.
For businesses looking to amplify their digital presence, leveraging expert digital marketing services can provide a significant advantage. Kleza helps businesses navigate the complexities of online advertising, ensuring your campaigns are always geared towards optimal performance.
Advanced Strategies and Kleza’s Role in Your Success
Beyond the basics, several advanced tactics can further elevate your Google ads ROI optimization efforts.
Explore Audience Segmentation and Retargeting
Audience segmentation means dividing your audience into groups like website visitors, customer lists, or people showing buying intent so you can send them more relevant messages instead of the same ad for everyone. Retargeting means showing ads to people who have already interacted with your business, which usually works better because they already know you. Together, this helps bring back interested users and improves your ROI by focusing on people more likely to convert.
Automate and Integrate with CRM
Automation helps you manage campaigns faster and spend less time on manual work, so you can focus more on strategy. Connect Google Ads with your customer relationship management (CRM) to see the full customer journey in one place. This setup lets you track leads from the first click to the final sale, giving you clear data on what drives conversions and helping you measure the ROI on your ad spend.
The Power of Professional Partnership for Google ads ROI optimization
Managing Google Ads campaigns for optimal ROI requires deep expertise, continuous effort, and access to the latest industry insights. Many businesses find that partnering with a specialized IT and digital services company like Kleza Solutions can unlock their full potential.
- Expert campaign strategy and setup aligned with your business goals
- Continuous monitoring and optimization to improve performance
- Access to advanced tools and analytics for deeper insights
- Clear reporting so you always know what is working
At Kleza, we are committed to help businesses thrive online. Our team of experts understand the nuances of Google Ads and how to craft campaigns that deliver exceptional results. We build lasting partnerships and focus on your growth and success. Our approach to Google ads ROI optimization is data-driven, so every decision is based on performance and focused on improving your profits.
Ready to Maximize Your Google Ads ROI?
Achieving outstanding Google ads ROI optimization is an ongoing process that demands expertise, dedication, and strategic insight. By implementing these tips and continuously refining your approach, you can transform your Google Ads spend into a powerful engine for business growth. Don’t let your valuable ad budget go to waste.
If you’re looking to elevate your digital marketing efforts and ensure your Google ads ROI optimization is at its peak,contact us today at +1 913-800-2728. Let’s discuss how our tailored strategies can help you achieve your business objectives and unlock the full potential of your online advertising.

by Navadeep Varma | Apr 21, 2026 | Blog
The bustling landscape of Dubai demands innovation, and businesses are constantly seeking an edge to convert fleeting visitors into loyal customers. The answer lies in the next generation of digital platforms: AI Driven Websites. These intelligent online presences, known as AI Driven Websites, are not just static brochures; they are dynamic, responsive ecosystems powered by artificial intelligence.
In a market where digital engagement is paramount, static websites often fall short. AI integration elevates a website from a mere information portal to a powerful, personalized selling and engagement tool, capable of understanding and responding to individual user needs in real-time. This transformation is not just a trend; it’s a strategy imperative for growth in Dubai’s competitive digital economy.
The Power of Personalization: How AI Driven Websites Elevate Customer Experience
In Dubai’s diverse and demanding market, generic experiences no longer suffice. Customers expect relevance, speed, and seamless interaction. This is where AI Driven Websites truly shine. By leveraging advanced algorithms, these platforms can analyze user behavior in real-time, understanding preferences, past interactions, and even predicting future needs. This capability allows for unparalleled personalization, from dynamic content delivery to tailored product recommendations.
Imagine a website that greets a returning customer with their preferred language, suggests products based on their browsing history, and adapts its layout to suit their device and viewing habits. This level of bespoke interaction provided by AI Driven Websites is crucial for standing out. According to Accenture, 91% of consumers are more likely to shop with brands that provide relevant offers and recommendations. AI makes this possible, turning every visitor interaction into an opportunity for a deeper, more meaningful connection, ultimately boosting conversion rates and customer loyalty.
Key AI Features Transforming Online Engagement
From sophisticated chatbots to predictive analytics, the features embedded within AI Driven Websites are truly transformative. They empower businesses to offer a superior user experience, automate processes, and gain invaluable insights into their customer base. Following are the essential AI Features that transform a business’ online engagement:
- AI Chatbots and Virtual Assistants
These intelligent conversational interfaces provide instant support, answer FAQs, guide users through purchase processes, and even collect leads, operating 24/7 without human intervention. They significantly reduce response times and improve customer satisfaction.
AI algorithms continuously learn from user data to predict future actions and preferences. This enables dynamic content adaptation, personalized product suggestions, and targeted marketing messages, ensuring maximum relevance for each visitor.
- Voice Search Optimization
With the rise of voice assistants, AI-powered websites are optimized to understand and respond to voice queries, offering a hands-free, intuitive browsing experience, especially important for mobile users on the go in a city like Dubai.
- Dynamic Content Generation
AI can automatically generate and optimize content (text, images, videos) based on user profiles and real-time interactions, ensuring that every visitor sees the most engaging and relevant information at all times.
By moving beyond static interfaces to adaptive, real-time engagement, businesses can cultivate the deep brand loyalty that defines market leaders. Ultimately, integrating these intelligent features transforms your website from a simple digital storefront into a powerful, high-conversion engine built for the future.
Implementing AI for Your Dubai Business with Kleza
The journey to an AI-powered digital presence might seem complex, but with the right partner, it’s a streamlined path to unparalleled growth. Implementing cutting-edge AI Driven Websites requires expertise in development, data science, and digital strategy.
Kleza, a leading IT, Development, and Digital Services company in Dubai, specializes in crafting innovative web solutions that drive business success. We understand the unique challenges and opportunities within the Dubai market and are adept at integrating AI to create intelligent, high-performing websites. Our website development services focus on building robust, scalable, and secure platforms that leverage the latest AI technologies. From initial consultation to deployment and ongoing support, we ensure your digital transformation is smooth and effective. Discover more about our capabilities on our about us page or explore our comprehensive range of services, including digital marketing, to ensure your AI-powered site gets the visibility it deserves. For more insights and trends, visit our blog page.
The future of online business in Dubai is intelligent, personalized, and driven by AI. Don’t let your business be left behind. Embrace the power of AI to convert more visitors into loyal, valuable customers.
Ready to transform your digital presence with sophisticated AI Driven Websites?
Connect with the experts at Kleza today to discuss how AI can revolutionize your website and drive unprecedented business growth. Contact us for a personalized consultation and let’s build your future-ready online platform.
by Navadeep Varma | Apr 13, 2026 | Blog
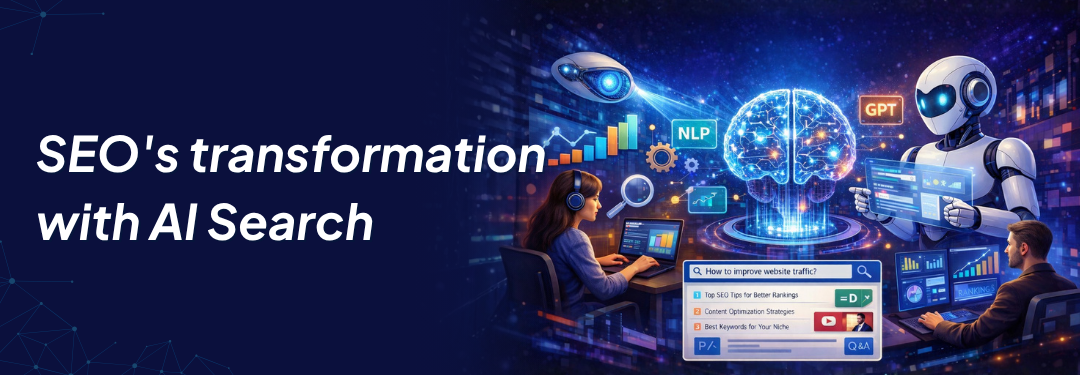
The digital landscape is in constant flux, and with the rise of artificial intelligence, traditional SEO is undergoing a seismic shift. Businesses today face the complex challenge of reaching their audience across an ever-expanding array of platforms, devices, and search interfaces. This evolution demands a new approach: Kleza understands that it’s no longer just about ranking on Google, but about achieving true Search Everywhere Optimization.
In a world where users interact with information through voice assistants, smart devices, social media, and generative AI search results, simply optimizing for web crawlers is insufficient. This paradigm shift requires a comprehensive strategy that ensures your brand’s visibility and relevance across every potential touchpoint, making Search Everywhere Optimization a critical component of modern digital success.
The Evolution from SEO to Search Everywhere Optimization
For years, SEO professionals have focused on keywords, backlinks, and technical optimizations for search engines like Google. While these fundamentals remain important, AI has broadened the definition of “search.” AI-powered algorithms now interpret user intent with unprecedented accuracy, pulling information from diverse sources to provide direct answers, summaries, and personalized recommendations. This means your brand needs to be present and optimized not just on your website, but in knowledge panels, featured snippets, voice search results, social media algorithms, and even within AI chatbots.
Use Cases for Search Everywhere Optimization:
- Voice Search Dominance: Optimizing content for conversational queries (e.g., “Hey Google, where’s the best IT services company near me?”) to appear in direct voice answers.
- Generative AI Integration: Structuring data and content to be easily digestible and retrievable by AI models generating summaries and insights.
- Social Media Visibility: Enhancing profile and content optimization across platforms like LinkedIn and Facebook, where users often discover businesses directly through search or algorithm-driven feeds.
- Local Search Excellence: Ensuring consistent and accurate business information across Google My Business, Apple Maps, and other local directories for location-based queries.
- Rich Snippets & Structured Data: Implementing schema markup to help search engines understand your content better, leading to enhanced listings in SERPs that grab attention.
Benefits of Embracing Search Everywhere Optimization
Adopting a holistic approach to Search Everywhere Optimization offers numerous advantages for businesses looking to thrive in the AI era. It ensures your brand isn’t just found, but discovered and engaged with, regardless of how or where your target audience initiates their search journey.
Key Benefits Include:
- Increased Brand Visibility: Reach a broader audience across more channels and devices.
- Enhanced User Experience: Provide immediate, relevant answers to user queries, fostering trust and loyalty.
- Improved Authority & Credibility: Consistent, accurate information across platforms strengthens your brand’s reputation.
- Future-Proofing Your Strategy: Adapt proactively to emerging search technologies and platforms.
- Higher Conversion Rates: More targeted visibility leads to better qualified leads and customer acquisition.
Industry insights highlight the urgency of this shift. According to research, the global market for conversational AI is projected to grow to $41.39 billion by 2030, underscoring the importance of optimizing for voice and natural language queries. Furthermore, a BrightEdge study found that rich results, driven by structured data, can increase click-through rates by up to 43%.
Practical Tips for Your Search Everywhere Optimization Strategy
To effectively navigate this evolving landscape, businesses must implement a multi-faceted strategy. Kleza, with its expertise in digital marketing and web development, provides tailored solutions to help you achieve comprehensive visibility.
Here are some practical tips:
- Optimize for Intent, Not Just Keywords: Understand the underlying need behind a user’s query, whether it’s informational, navigational, or transactional.
- Prioritize Structured Data: Implement schema markup for products, services, FAQs, reviews, and local business information to enhance how AI models and search engines interpret your content.
- Create High-Quality, Authoritative Content: AI values well-researched, factual, and comprehensive content. Become a go-to source for reliable information in your niche.
- Focus on E-E-A-T: Google’s emphasis on Experience, Expertise, Authoritativeness, and Trustworthiness is more critical than ever. Showcase your team’s knowledge and build a strong online reputation.
- Leverage Local SEO: Optimize your Google Business Profile and ensure consistent NAP (Name, Address, Phone) information across all directories.
- Monitor & Adapt: The AI landscape is dynamic. Continuously track performance metrics across various search platforms and adapt your strategy accordingly.
A truly integrated approach involves everything from robust website development that supports fast loading times and mobile responsiveness, to sophisticated digital marketing strategies that encompass social media, content marketing, and advanced analytics. Kleza’s holistic approach ensures your digital presence is not only optimized for today’s AI but also prepared for tomorrow’s innovations.
For more insights and to stay ahead of the curve, visit our resources section.
Partner with Kleza for Search Everywhere Optimization
The shift to AI search is not just a trend; it’s a fundamental change in how users discover information and engage with brands today. Embracing Search Everywhere Optimization is no longer optional but essential for sustained digital growth and competitive advantage.
Don’t let your business get lost in the noise of the evolving digital world. Partner with Kleza to develop a robust strategy that ensures your brand achieves unparalleled visibility across all search touchpoints. Our experts are ready to guide you through the complexities of AI-powered search, transforming challenges into opportunities for growth.
Ready to redefine your digital presence and achieve true Search Everywhere Optimization? Contact Kleza today for a consultation and let us help your business thrive in the age of AI.

by Navadeep Varma | Apr 7, 2026 | Blog
The digital landscape is constantly evolving, and for businesses in Canada, staying ahead means embracing the future of online visibility. As we approach 2026, the question isn’t whether SEO is still relevant, but how it’s being transformed by cutting-edge technology. The answer lies in AI powered SEO, a game-changer for achieving sustainable organic growth.
Many businesses struggle with the complexity of reaching their target audience amidst increasing competition. Traditional SEO methods, while foundational, are no longer sufficient to assure top rankings. This is where ai powered seo steps in, offering intelligent, data-driven solutions that optimize your digital presence with unparalleled precision and efficiency.
The Evolution of Search: How AI is Reshaping SEO
The days of simple keyword stuffing and manual link building are long gone. Search engines, particularly Google, now rely heavily on sophisticated AI alogorithms
like RankBrain, BERT, and MUM to understand user intent and deliver the most relevant, high-quality content. This shift demands a more intelligent approach to optimization, one that only AI powered SEO can truly deliver.
AI’s impact extends beyond just understanding content; it influences every aspect of the search journey. From predicting user queries to personalizing search results, AI is making search more intuitive and human-like. For businesses, this means that success hinges on aligning their digital strategy with these advanced AI capabilities.
Harnessing AI powered SEO for Competitive Advantage
For Canadian businesses, leveraging AI powered SEO isn’t just an option; it’s a strategic imperative. AI algorithms can process vast amounts of data, identifying trends, predicting search behavior, and even generating content ideas that resonate with your audience. This predictive power allows for proactive optimization, ensuring your business stays one step ahead.
Key Benefits and Use Cases of AI in SEO:
- Predictive Analytics: AI analyzes historical data to forecast future search trends, allowing businesses to create content for emerging keywords before competitors do.
- Content Optimization and Generation: AI tools can analyze existing content for readability, SEO gaps, and even assist in generating drafts or optimizing existing text for maximum impact. This includes refining tone, structure, and keyword integration.
- Personalized User Experiences: AI helps in understanding individual user preferences, enabling more personalized content delivery and improving engagement signals, which indirectly boosts rankings.
- Technical SEO Audits: AI-driven tools can quickly identify and diagnose complex technical SEO issues on your website, from crawling errors to site speed bottlenecks, far more efficiently than manual methods. Kleza offers expert website development that integrates these technical best practices.
- Enhanced Keyword Research: Beyond identifying high-volume keywords, AI uncovers long-tail opportunities, semantic relationships, and user intent behind queries, leading to more targeted strategies.
- Competitor Analysis: AI can monitor competitor strategies, backlinks, and content performance at scale, providing actionable insights for your own campaigns.
Reports indicate that businesses leveraging AI for SEO can see up to a 40% increase in organic traffic within the first year by adopting these intelligent strategies. A recent survey among Canadian SMBs showed that 70% plan to increase their investment in AI-driven digital marketing by 2026, underscoring the growing recognition of its value.
Practical Tips for Integrating AI powered SEO into Your Strategy
Implementing AI powered SEO doesn’t require overhauling your entire digital strategy overnight. It’s about smart integration and leveraging the right tools. Kleza, a leader in digital services, understands the nuances of this transition. Our approach focuses on seamless integration of AI to amplify your existing efforts.
Start by identifying areas where AI can provide the most immediate impact, such as content ideation or technical audits. Partnering with experts who understand both AI and SEO can significantly accelerate your journey. We believe in empowering businesses through data-driven insights and innovative solutions for their digital marketing needs.
Keep an eye on emerging AI tools and platforms that specialize in different aspects of SEO. Regularly review your analytics to understand the impact of AI-driven changes. Continuous learning and adaptation are crucial in this fast-paced environment. For more insights and resources, explore our blog section.
The Kleza Difference: Your Partner in AI powered SEO
At Kleza, we are at the forefront of this digital revolution. Our team of experts combines deep understanding of SEO principles with advanced AI capabilities to craft bespoke strategies that drive real, measurable organic growth for Canadian businesses. We don’t just implement tools; we integrate intelligent solutions that align with your unique business goals and market dynamics. Learn more about us and our commitment to innovation.
Whether you’re looking to optimize your website, improve your content strategy, or dominate local search results, Kleza provides the expertise and technology to make it happen. Embrace the future of search with a partner who understands the intricacies of the Canadian market and the power of AI.
Ready to unlock unparalleled organic growth for your Canadian business through AI powered SEO? Don’t let your competitors get ahead. Partner with Kleza and transform your digital presence.
Contact Kleza today at +1 913-800-2728 for a personalized consultation and discover how our expertise in AI powered SEO can propel your business forward. Visit our website or reach out to us at https://kleza.io/contact-us/ to get started.
by Navadeep Varma | Feb 3, 2026 | Blog
Today, content is being produced and consumed at a rapid pace. The digital landscape is brimming with all types of content; some authentic and verified, while others not even close to reality. In a landscape of fragmented content, to build brand authority isn’t just a perk—it’s a necessity. When the market is crowded, trust is the only bridge that successfully connects a business to its customers. In simpler words, here is what that means: How do you get people to trust you when everyone is overwhelmed with information and nobody believes what they see online anymore?
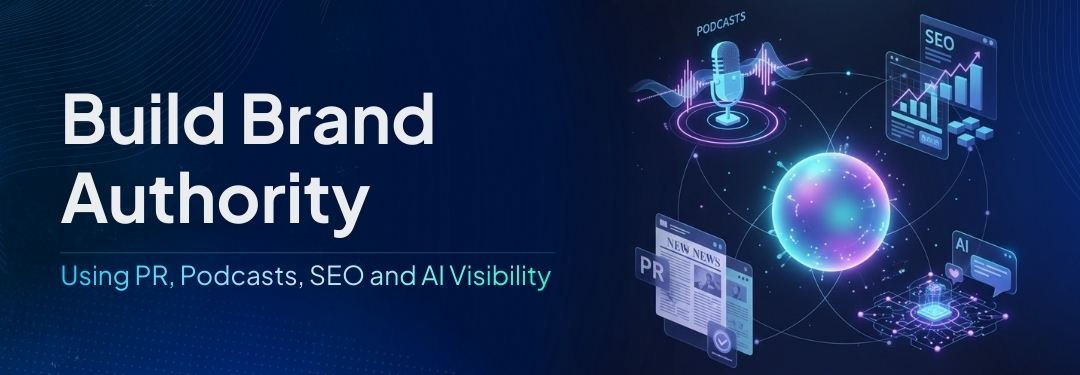
The solution is the “New Trust Stack.” It is a modern game plan that builds your reputation by combining four specific tools:
- PR: Getting respected news outlets to talk about you.
- Podcasts: Letting people hear your voice and personality.
- SEO: Making sure you show up first when people search for answers.
- AI Visibility: Ensuring AI tools (like ChatGPT) mention you as a reliable source.
Gone are the days when a glossy ad campaign or a well-placed article alone could guarantee credibility. Modern consumers are smarter, wiser, and more likely to trust diverse, consistent touchpoints across multiple platforms. In the next section, let’s explore how marketers prioritize and implement use of PR, Podcasts, SEO and AI visibility.
Adopting PR, Podcasts, SEO and AI Visibility to Build Brand Authority
1. Press Releases: The Engine of Brand Authority
At its core, the strategic press release remains a crucial tool to build brand authority by transforming company updates into newsworthy milestones. When your brand’s achievements are picked up by reputable news wires and trade publications, it provides a layer of institutional “proof” that marketing alone cannot buy. This isn’t just about announcing a new hire or a product launch; it’s about crafting a narrative of momentum and industry leadership.
A well-distributed press release builds brand authority by creating a permanent, searchable record of your company’s growth and expertise. Unlike social media posts that disappear in a feed, a press release indexed by major search engines acts as a credible anchor for your digital footprint. For a more effective distribution strategy, think beyond the standard “announcement” and consider data-driven reports, community impact initiatives, and pioneering research findings. This ensures that when stakeholders perform due diligence on your brand, they encounter a history of professional excellence validated by independent journalistic standards.
2. Podcasts: The Intimate Connection
While PR provides broad validation, podcasts seek to establish an intimate and direct bond with your audience. In an audio-first world, these long-form, niche-specific talks help to build brand authority and trust amongst listeners. Whether you host your own podcast, appear as a guest on industry-relevant shows, or sponsor popular programs, the medium fosters a unique level of trust.
Unlike fleeting social media posts, podcast listeners often dedicate significant time to an episode, absorbing information while commuting, exercising, or performing household tasks. When you share insights, tell stories, and engage in authentic conversations, you position yourself as a humanized, approachable authority. Furthermore, podcast content is evergreen; a well-produced episode can continue to attract new listeners and build trust for months or even years. It’s also a powerful tool for repurposing content, generating snippets for social media, and transcribing for SEO benefits.
3. Search Engine Optimization (SEO): The Pathway to Discovery
No matter how credible your PR or how engaging your podcast, if people can’t find you, your efforts are diminished. This is where SEO steps in as the crucial pathway to discovery and ongoing trust-building. SEO ensures that when potential customers search for solutions, information, or even reviews related to your industry, your brand appears prominently.
Modern SEO is far more sophisticated than keyword stuffing. It’s about providing genuine value, demonstrating expertise, experience, authoritativeness, and trustworthiness (E-E-A-T) – concepts that Google heavily prioritizes. This means you naturally build brand authority by creating high-quality, relevant content that answers user questions, optimizing your website for user experience, ensuring mobile responsiveness, and building a robust backlink profile from reputable sources. Effective SEO ensures that when curiosity strikes, your brand is the reliable answer, reinforcing the trust cultivated through PR and podcasts.
4. AI Visibility: The Future of Trust and Discovery
The newest and rapidly evolving layer of the Trust Stack is AI Visibility. As AI-powered tools like ChatGPT, Bard, and other large language models (LLMs) become primary sources of information for consumers, brands need to adapt. How will your brand be represented when an AI is asked about your industry, your products, or your solutions?
AI models learn from the vast ocean of data available online. This means that strong PR, comprehensive SEO, and rich, expert-driven podcast content are now critical inputs for shaping how AI “understands” and articulates your brand’s value. If your brand consistently appears in credible news sources, is discussed by authorities in podcasts, and ranks highly for relevant search queries, AI is more likely to retrieve and synthesize positive, accurate information about you.
To build brand authority for AI visibility, you need to ensure your content is clear, factual, well-structured, and provides definitive answers to common questions. It’s about being present and authoritative across all digital touchpoints so that when an AI summarizes information, your brand is presented as a trusted, knowledgeable entity. This isn’t just about being found on Google, it’s more about being recognized and recommended by the intelligent agents that are increasingly guiding human decisions.
Use Kleza Solution’s Vast Expertise to Build Brand Authority
Reading this blog and understanding the layers of the Trust Stack is not enough to help you build brand authority. The truth is that your brand needs the help of experts who consistently help brands across various niches and domains build content that is reliable, trusted and authoritative.
At Kleza Solutions, we have an experienced digital marketing team who know in-depth SEO skills and have also adopted essentials of PR, podcasts and AI visibility. They can help you on the path to build brand authority with their knowledge and expertise. We also offer various services such as Website Development, E-Commerce and Digital Marketing Services that are integrated with the latest AI tools to help enhance your brand’s credibility, amplify your message, and drive sustainable growth. Our team consistently works with you to innovate, strategize and create powerful content that has all the essential layers of the Trust Stack to build brand authority and drive trust for your brand.
Contact us today to transform your digital presence into a powerhouse of trust and authority. Let’s build your future, together.